Follow Me On Social Media!
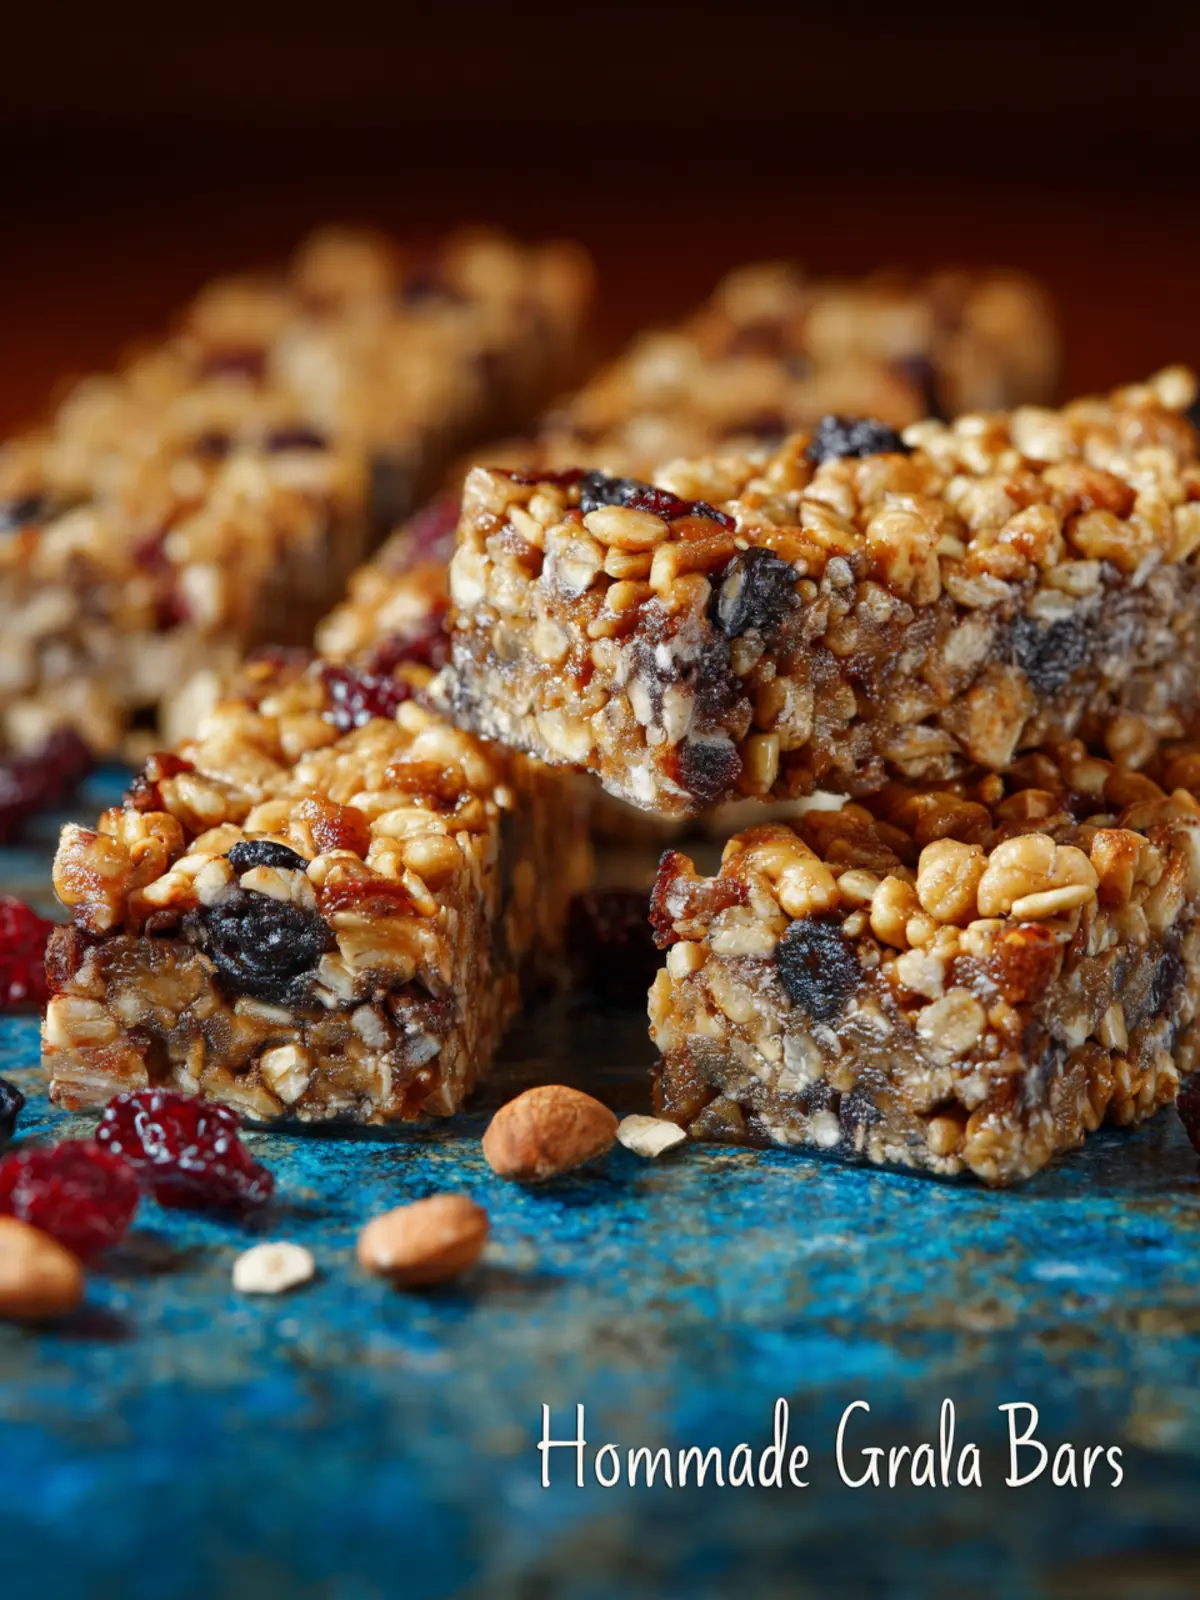
Homemade Granola Bars: The Best Snack for Guilt-Free Munching
Introduction to Homemade Granola Bars
Imagine a busy morning where you’re dashing out the door but still want something wholesome to fuel your day. This is where homemade granola bars come to the rescue! These delightful snacks are not just a treat; they’re a lifeline for those of us trying to balance work, play, and everything in between. Packed with nutrients and customizable to your taste, they make snacking easy and enjoyable without the guilt often associated with store-bought options.
In today’s fast-paced world, homemade granola bars offer more than just convenience. They allow you to control the ingredients, ensuring that you know exactly what’s fueling your body. Whether you’re tackling a mountain of paperwork, brainstorming for a presentation, or hitting the gym, having a delicious, nutritious snack readily available can keep you energized. It’s all too easy to grab that tempting, sugary treat or an over-processed protein bar, but with a little planning and creativity, you can whip up a batch of these bars that not only satisfy your cravings but also nourish your body.
Why Homemade Granola Bars Are a Game-Changer for Busy Professionals
-
Customizable Ingredients: Have a nut allergy? Prefer certain flavors? Making homemade granola bars means you decide what goes in. From nuts and seeds to dried fruits and sweeteners, you can mix and match your favorite ingredients.
-
Budget-Friendly: Buying pre-packaged snacks can quickly add up. By preparing your own granola bars, you can save money while still enjoying delicious snacks that are healthier than many store options.
-
On-the-Go Convenience: Our lives are hectic, and having a quick, nutritious snack on hand means one less thing to worry about. Toss a granola bar in your bag, and you’ve got yourself a healthy option for those busy days.
Homemade granola bars are not just about convenience; they’re about empowerment. Each bite encourages you to make healthier choices, maintain energy, and even enjoy the process of cooking. So let’s get started on your journey to snack bliss!
Key Ingredients for Homemade Granola Bars
Creating your own homemade granola bars is not just about saving money; it’s the joy of crafting something uniquely yours. Let’s explore the key ingredients that come together to make this delightful snack.
Oats: Rolled oats are the star of the show. Their hearty texture forms the base of your granola bars, providing essential fiber and making them filling. Steel-cut oats can be a little too chewy, so stick with rolled for that perfect bite.
Nut Butters: I usually go for creamy almond or peanut butter for a deliciously nutty flavor and a good dose of healthy fats. If you prefer, sunflower seed butter is a great alternative for a nut-free option.
Sweeteners: Honey or maple syrup not only sweeten your bars but also help bind everything together. Both add a distinct flavor that balances well with the oats and nuts.
Nuts and Seeds: Chopped nuts like almonds or walnuts add crunch, while seeds like chia or sunflower pack in extra nutrients. Feel free to mix and match based on what you have on hand.
Add-ins: Dried fruits like cranberries or apricots bring sweetness and chewiness, while dark chocolate chips can satisfy your sweet tooth. You’ll love customizing your bars to reflect your favorite flavors!
Why You’ll Love This Recipe
There’s something incredibly satisfying about making your own homemade granola bars. Picture this: coming home after a long day, and instead of reaching for a processed snack, you have a deliciously chewy, personalized treat waiting for you—one that you crafted with wholesome ingredients.
Perfect for Any Occasion
Whether you’re hitting the trails, packing your lunch, or just craving a sweet but healthy treat, these bars are fantastic. You can easily tailor them to your specific tastes. Want to add some chocolate chips? Go for it! Prefer dried cranberries over raisins? Do it! The flexibility means you can experiment and find your perfect combination.
Healthy and Wholesome Ingredients
By choosing your own ingredients, you ensure that each bite is packed with nutrients rather than empty calories. These homemade granola bars are great for fueling your busy lifestyle. Packed with oats, nuts, and whatever mix-ins you desire, they provide a balanced energy boost. Each bite is a delightful crunch, ensuring you’re never stuck with bland snacks again.
Budget-Friendly Delight
Instead of splurging on store-bought bars, which can add up quickly, this recipe allows you to whip up a batch for a fraction of the cost. Not only is this kind to your wallet, but it also gives you the satisfaction of homemade goodness.
With all these benefits combined, it’s clear why you’ll fall in love with this homemade granola bars recipe. Who wouldn’t want a treat that’s both delicious and nutritious?
Variations on Homemade Granola Bars
Creating homemade granola bars opens up a world of flavor possibilities. Imagine a snack that’s not only nutritious but also tailor-made to your taste preferences—just like a dish that comforts you on a busy weekday or a gourmet treat to wow your friends. Here are a few creative variations to inspire your next batch!
Nutty Delight
- Nuts: Swap out the standard mix of peanuts and almonds with walnuts, pecans, or hazelnuts for a different texture and flavor.
- Seeds: Incorporate sunflower or hemp seeds for an added crunch and a nutrient boost.
Fruity Additions
- Dried Fruits: Experiment with different dried fruits like cranberries, cherries, or apricots. The tartness of cranberries pairs beautifully with the sweetness of honey or maple syrup.
- Fresh Fruit: For a twist, use mashed bananas or applesauce in your mixture to add moisture and natural sweetness.
Sweet and Spicy
- Spices: Elevate your granola bars by adding cinnamon, nutmeg, or even a pinch of cayenne pepper for a surprising kick.
- Sweeteners: Try maple syrup or agave instead of honey for a unique flavor profile.
Chocolate Lovers
- Cocoa: Mix in cocoa powder or melted dark chocolate to satisfy that sweet craving.
- Chips: Fold in chocolate chips or chunks for a deliciously rich finish.
Feel free to mix and match these variations to craft the homemade granola bars that are perfect for you!
Cooking Tips and Notes for Homemade Granola Bars
Creating homemade granola bars isn’t just about following a recipe; it’s a journey of flavors and textures that can be customized to your liking. Imagine the satisfying crunch of the oats paired with the chewiness of dried fruits— each bite is a delightful balance of nutrition and taste!
Choosing the Right Ingredients
- Oats: Opt for rolled oats rather than instant oats. They provide better texture and chewiness in your homemade granola bars.
- Sweeteners: Experiment with different sweeteners like honey, maple syrup, or agave nectar. Each adds a unique flavor profile to your bars—try maple for a warm, cozy vibe!
- Nuts and Seeds: Feel free to mix things up! Almonds, walnuts, or pumpkin seeds not only add crunch but also boost the nutritional value. Personally, I love the combination of almonds and sunflower seeds for their nutty flavor.
- Dried Fruits: Select fruits that you enjoy! Whether it’s raisins, cranberries, or apricots, ensure they’re chopped into small pieces. This makes for easier snacking and better dispersal in each bar.
Perfecting Your Technique
- Press Firmly: When you spread your mixture into the pan, press it down hard! This ensures your homemade granola bars hold together after baking.
- Cooling Time: Be patient! Let them cool completely before slicing; this makes them easier to cut and promotes a better bind.
- Storage Tips: Wrap them individually in parchment paper for on-the-go snacking, or store them in an airtight container to keep them fresh longer.
With these tips, you’re on your way to making delicious homemade granola bars that will impress friends and family alike! Whether you’re grabbing one for breakfast or a midday snack, you’ll feel good about what you’re eating.
Serving Suggestions for Homemade Granola Bars
When crafting your own homemade granola bars, the possibilities for serving and pairing are as exciting as the recipe itself. These bars can seamlessly fit into breakfast, snacks, or even a light dessert. Let’s explore some delightful ways to elevate your homemade creation.
-
Breakfast Boost: Crumble your granola bars over a bowl of yogurt topped with fresh fruit. This not only adds a satisfying crunch but also infuses your breakfast with additional flavor and nutrients.
-
On-the-Go Snack: Pack a granola bar in your bag for a quick snack at work or during your commute. The convenience makes them a great alternative to store-bought options, which can be full of preservatives.
-
Indulge with Nut Butter: Spread almond or peanut butter on top of a bar. This adds creaminess and an extra hit of protein that’s perfect for post-workout recovery.
-
Pair with Milk or Plant Milk: Break the bar into pieces and enjoy it with a glass of cold milk or your favorite plant-based alternative. This combination is not only tasty but also filling.
By using your creativity, you can take these homemade granola bars to new heights, matching them to your mood or occasion. Enjoy experimenting!
Time Breakdown for Making Homemade Granola Bars
Creating your own homemade granola bars not only offers a delicious end result but also fits perfectly into your busy schedule. Knowing how long each step will take can make the process more enjoyable.
Preparation Time
Getting everything ready takes about 15 minutes. This includes gathering your ingredients, chopping nuts or fruits, and mixing your dry ingredients with the wet.
Baking Time
The actual baking is quick, usually around 25-30 minutes. It’s just enough time to catch up on a podcast or enjoy a cup of tea while the bars set in the oven.
Total Time
In total, you’ll spend approximately 45-60 minutes from start to finish. Not only will you have a yummy snack on hand, but you’ll also feel accomplished for making it from scratch!
Nutritional Facts for Homemade Granola Bars
Understanding the health benefits of homemade granola bars adds to their appeal. When you make them at home, you can tailor the ingredients to fit your nutritional needs.
Calories:
A typical serving of homemade granola bars contains around 200 calories. This provides a satisfying energy boost without going overboard.
Protein:
These bars are a great source of protein, offering approximately 5-7 grams per serving depending on chosen ingredients like nuts and seeds.
Fiber:
With around 3-4 grams of fiber, homemade granola bars aid in digestion and promote a feeling of fullness.
Sugars:
These delicious snacks can have about 5 grams of sugars per serving, mainly from natural sources like honey or dried fruits, making them a healthier alternative to many store-bought varieties.
By knowing the nutritional facts, you can enjoy your homemade granola bars guilt-free!
FAQ on Homemade Granola Bars
If you’re excited to delve into the world of homemade granola bars, you’re not alone! They’re a fantastic snack option, bursting with flavor and nutrients. As you whip up your batch, questions may surface, and I’m here to help you navigate through the most common ones.
Can I customize the add-ins for my granola bars?
Absolutely! One of the great joys of making homemade granola bars is the ability to personalize them. You can easily swap out or add in:
- Nuts: Almonds, walnuts, or pecans can provide a nice crunch.
- Dried Fruits: Raisins, cranberries, or apricots are delicious options.
- Seeds: Chia, flax, or pumpkin seeds are nutrient-dense and add texture.
- Spices: A sprinkle of cinnamon or nutmeg can elevate the flavors beautifully.
Feel free to experiment and create a version that tantalizes your taste buds!
How do I store homemade granola bars for freshness?
To keep your homemade granola bars fresh and chewy, you should:
- Wrap them individually: Use parchment paper or plastic wrap.
- Store them in an airtight container: This helps maintain moisture.
- Refrigerate for longer shelf life: They’ll last about a week at room temperature, but refrigeration can extend that to two weeks.
Can I make these granola bars vegan?
Definitely! To convert your homemade granola bars into a vegan version, simply replace honey with maple syrup or agave nectar. Use plant-based nut butter for added creaminess, and you’re all set.
What’s the best way to cut and serve them?
For smooth edges on your homemade granola bars, let them cool completely before cutting. Using a sharp knife, try these tips:
- Chill in the fridge for 30 minutes before cutting to firm them up.
- Cut them into desired shapes: Squares, rectangles, or even fun shapes with cookie cutters for kids.
Enjoy your delicious and satisfying snack!
Conclusion on Homemade Granola Bars
Creating your own homemade granola bars is not just a baking project; it’s a delicious way to nourish yourself with wholesome ingredients. Imagine snacking on a flavorful bar that’s packed with your favorite nuts, fruits, and grains, all expertly combined to fit your taste. Unlike store-bought versions loaded with preservatives, these bars allow you to control every bite. They’re perfect for busy mornings, afternoon pick-me-ups, or even post-workout fuel. With endless customization options, you’ll look forward to making a fresh batch every week! Dive into the joy of healthy snacking with your homemade creations today.
Print
Honey Oat Bars
- Total Time: 30 minutes
- Yield: 16 bars 1x
- Diet: vegetarian
Description
These delicious honey oat bars are easy to make and perfect for a healthy snack or dessert.
Ingredients
Scale
- 1 cup butter (softened)
- 1 cup honey
- 4 1/2 cups rolled oats
- 1 cup whole wheat or spelt flour
- 1 tsp baking soda
- 1 tsp vanilla
- Add ins of choice (mini semi-sweet chocolate chips, chopped walnuts, dried fruit, sunflower seeds, coconut, etc.)
Instructions
- Preheat oven to 325 degrees. Grease a 9″x13″ glass baking dish with butter.
- In a large mixing bowl, combine butter and honey and mix well.
- Add the oats, flour, baking soda, and vanilla and mix well.
- Stir in the add-ins by hand.
- Pour the mixture into the baking dish and press it firmly into the pan.
- Bake at 325 degrees for 15-20 minutes or until golden brown.
- Allow the bars to cool for at least 10 minutes before cutting into bars. Let them cool completely before removing and serving.
- They can be stored at room temperature or you can even freeze them for later use.
Notes
- They won’t look or feel “done,” but instead they will still be very moist.
- Don’t worry, they’ll harden as they cool.
- Prep Time: 10 minutes
- Cook Time: 20 minutes
- Category: snack
- Method: baking
- Cuisine: American
Nutrition
- Serving Size: 1 bar
- Calories: 150
- Sugar: 10g
- Sodium: 50mg
- Fat: 7g
- Saturated Fat: 4g
- Unsaturated Fat: 2g
- Trans Fat: 0g
- Carbohydrates: 22g
- Fiber: 2g
- Protein: 2g
- Cholesterol: 20mg