Follow Me On Social Media!
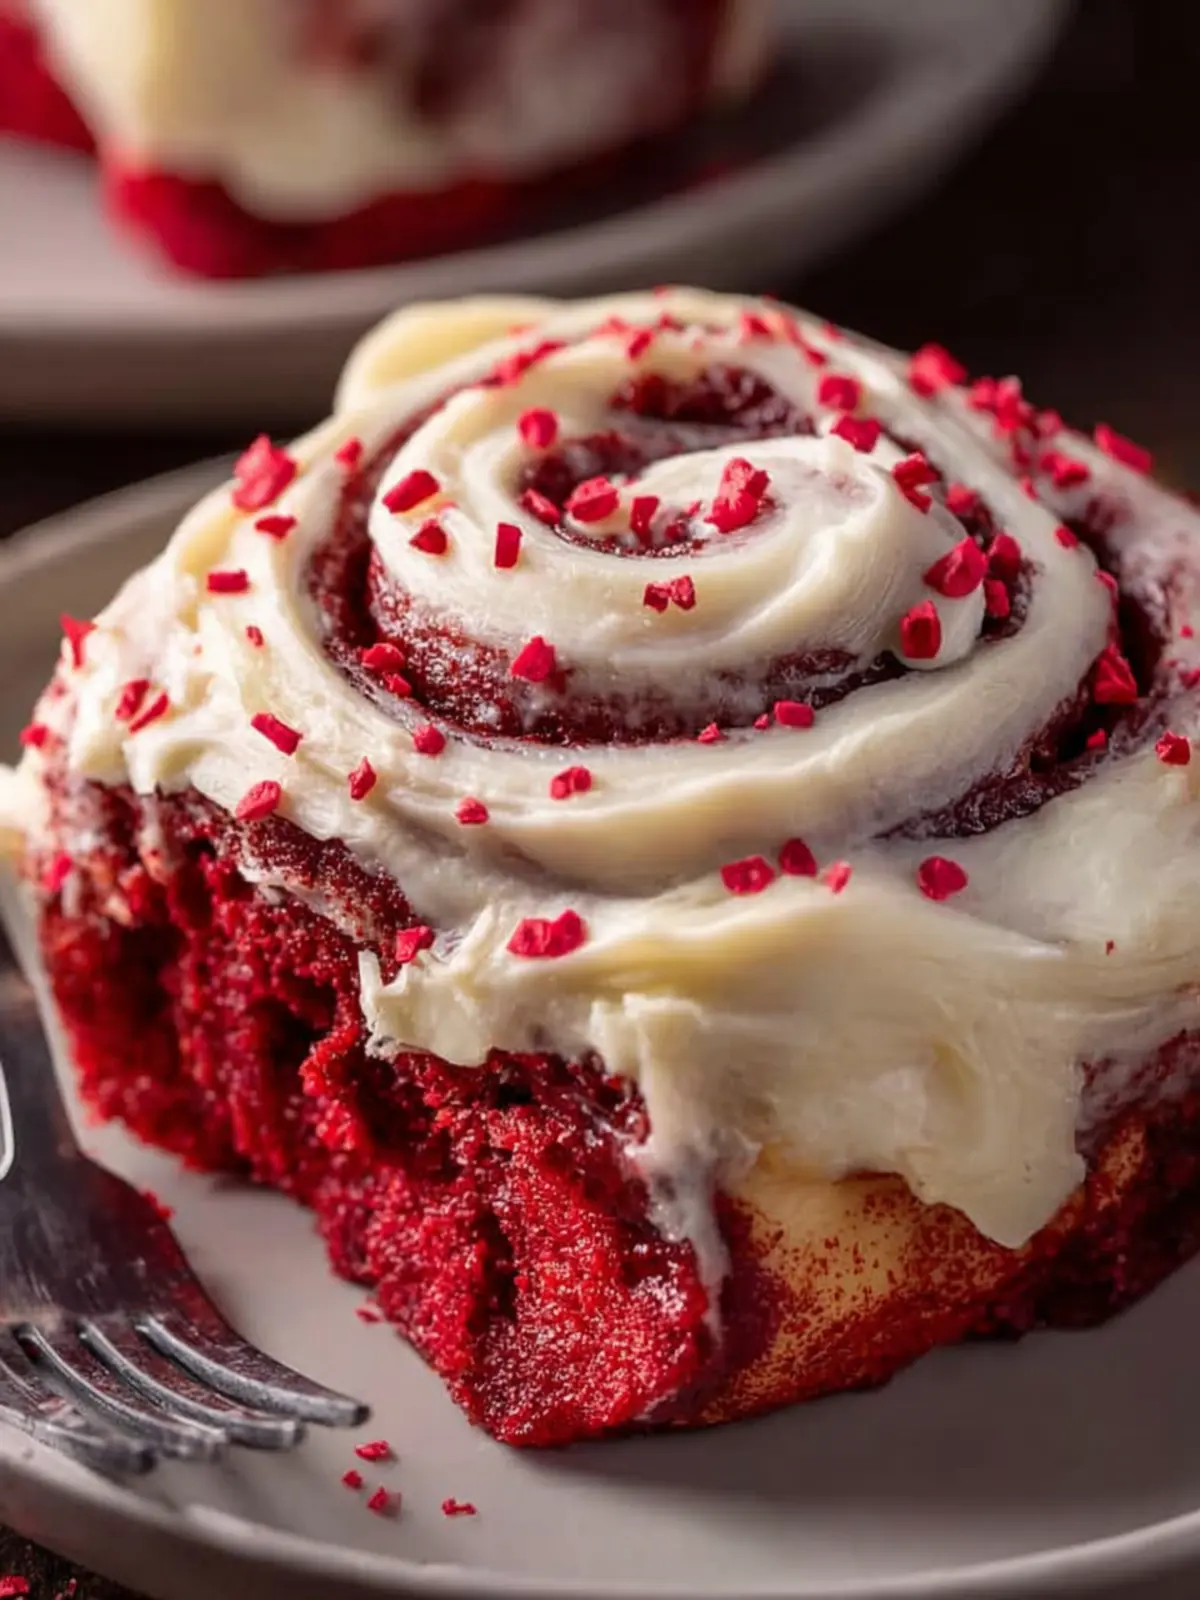
Homemade Red Velvet Cinnamon Rolls: Indulgent Cream Cheese Bliss
Introduction to Homemade Red Velvet Cinnamon Rolls with Cream Cheese Frosting
Imagine waking up to the irresistible aroma of homemade red velvet cinnamon rolls wafting through your kitchen, promising a delightful start to your day. This recipe not only enchants with its vibrant colors but also wraps each bite in a warm embrace of sweetness and spice. There’s something about the classic combination of warm, fluffy cinnamon rolls contrast with the rich, tangy cream cheese frosting that just makes the heart sing.
In this delightful recipe, the rich cocoa and buttermilk blend perfectly with the signature red hue to ensure your cinnamon rolls are not just visually stunning but also incredibly flavorful. These rolls transform any ordinary morning into a bakery-like experience right at home, making them a perfect treat for brunch with friends or a cozy family gathering. You don’t need a special occasion to enjoy them; a regular Tuesday can feel celebratory with a batch of these fluffy treasures on your table.
What’s the secret to the perfect homemade cinnamon rolls?
Creating homemade red velvet cinnamon rolls isn’t just about assembling ingredients; it’s about mastering a few crucial techniques that elevate your treats from good to extraordinary.
-
Yeast Activation: Always ensure your yeast is fresh and active. A bubbly yeast mixture means your dough is set to rise beautifully.
-
Dough Consistency: A soft, slightly sticky dough is key. They should be easy to handle but not so sticky that they cling to your fingers. Adjust flour gradually to get the perfect texture.
-
Proper Rising: Giving your rolls enough time to rise is fundamental. The first rise allows the dough to develop flavor and lightness, while the second rise helps achieve that pillowy softness.
-
Rolling Technique: Roll out the dough to a uniform thickness to ensure even distribution of the filling. This creates a consistent, spiraled design, and nobody wants a cinnamon roll that’s missing the good stuff.
-
Frosting Finish: Lastly, a generous swirl of cream cheese frosting is essential. The creamy tanginess beautifully balances the sweetness of the rolls and helps to elevate the overall flavor profile, making these cinnamon rolls unforgettable.
Get ready to impress yourself and others with this delicious recipe, as the journey to making homemade red velvet cinnamon rolls with cream cheese frosting is bound to fill your kitchen with joy!
Key Ingredients for Homemade Red Velvet Cinnamon Rolls
Crafting the perfect homemade red velvet cinnamon rolls requires careful attention to a handful of key ingredients that work together to create that delightful balance of flavors and textures. Each plays a vital role in the final masterpiece, transforming your kitchen into a cozy bakery.
All-Purpose Flour
Essential for structure, all-purpose flour gives the rolls a soft texture that holds up beautifully during baking. The right amount provides the foundation for fluffy cinnamon rolls that aren’t too dense or crumbly.
Whole Milk
The addition of whole milk not only helps to activate the yeast but also creates a rich, tender dough. Its creamy richness elevates the rolls, making them irresistibly moist.
Active Dry Yeast
This powerhouse ingredient is crucial for the rolls’ rise. Active dry yeast works magic, transforming your dough into a fluffy delight as it ferments and expands.
Granulated Sugar
Granulated sugar sweetens the dough while energizing the yeast. This double function results in beautifully sweet cinnamon rolls that rise perfectly, adding that classic bakery taste.
Unsalted Butter
Used both melted and softened, unsalted butter imparts richness and flavor. It’s essential for creating a melt-in-your-mouth experience that every cinnamon roll should deliver.
Eggs
Room temperature eggs create a more uniform dough while aiding in rising. They introduce essential moisture and richness, ensuring a tender final product.
Cream Cheese
The star of the frosting, cream cheese adds a tangy flavor that perfectly complements the sweetness of the rolls. This frosting transforms your cinnamon rolls from delicious to utterly divine.
With these ingredients, you’re well on your way to creating mouthwatering homemade red velvet cinnamon rolls that will impress everyone at the breakfast table!
Why You’ll Love This Recipe
Unique Flavor Fusion
Indulge in the delightful world of homemade red velvet cinnamon rolls, where the classic charm of red velvet cake meets the comforting allure of soft, pillowy cinnamon rolls. This recipe elevates the traditional cinnamon roll with its rich cocoa flavor and stunning red hue, creating a dessert that is not just delicious but also eye-catching. Imagine waking up to the sweet aroma of cinnamon and cream cheese wafting through your kitchen—it’s a breakfast that feels like a celebration!
Whimsical Appeal
Whether it’s a festive brunch, a cozy gathering, or simply a Tuesday treat, these homemade red velvet cinnamon rolls are your new go-to. Their vibrant color and lavish cream cheese frosting make them perfect for birthdays, holidays, or just because. Picture serving these delightful rolls to friends; the smiles and oohs and aahs of appreciation you’ll receive will make it all worth it.
Nostalgic Moments
There’s something about sharing food that creates cherished memories. These homemade red velvet cinnamon rolls are ideal for family gatherings or potlucks, evoking warm feelings of nostalgia. Gathering around a table, tearing apart a soft roll, and enjoying it together brings people closer. Each bite is not just a taste of deliciousness; it’s a moment shared, a memory made.
Cooking Tips and Notes
When creating your homemade red velvet cinnamon rolls, the little details make a big difference. Here’s how to elevate your baking game for these delightful treats.
Measure Ingredients Accurately
Precision is key in baking. Using the correct measurements ensures consistency in your homemade red velvet cinnamon rolls. Invest in a kitchen scale for dry ingredients like flour and sugar. When measuring liquids, use clear measuring cups with volume markings. Small variations can lead to discrepancies in texture and flavor, which we want to avoid!
Chill the Dough
Chilling your dough is a game-changer. After kneading your dough, consider wrapping it in plastic wrap and letting it chill in the fridge for at least 30 minutes. This makes it easier to handle and shape when you’re ready to roll. Plus, it helps the gluten relax, leading to a tender roll that’s simply irresistible!
Be Patient
The best texture comes from allowing your dough to rise fully. This might take longer than you expect, but the payoff is huge! Knead the dough until it’s smooth, and then let it rise until it’s doubled in size. Patience here can make all the difference, leading to light and fluffy red velvet cinnamon rolls that melt in your mouth.
By keeping these tips in mind, you’ll create a batch of cinnamon rolls that will impress your friends and family!
Serving Suggestions for Cinnamon Rolls
When you create homemade red velvet cinnamon rolls, the experience is about more than just the delightful taste; it’s about how you enjoy them too. Here are some serving suggestions to enhance your experience, ensuring you savor every bite.
Pairing Ideas
Enhance your morning ritual by enjoying homemade red velvet cinnamon rolls with a steaming cup of coffee or a soothing cup of tea. The rich flavors of the rolls beautifully complement the robust notes of coffee, while a delicate herbal tea can provide a refreshing counterpoint. Imagine a cozy weekend morning, your favorite drink in hand, and a warm roll waiting to melt in your mouth.
Decoration Tips
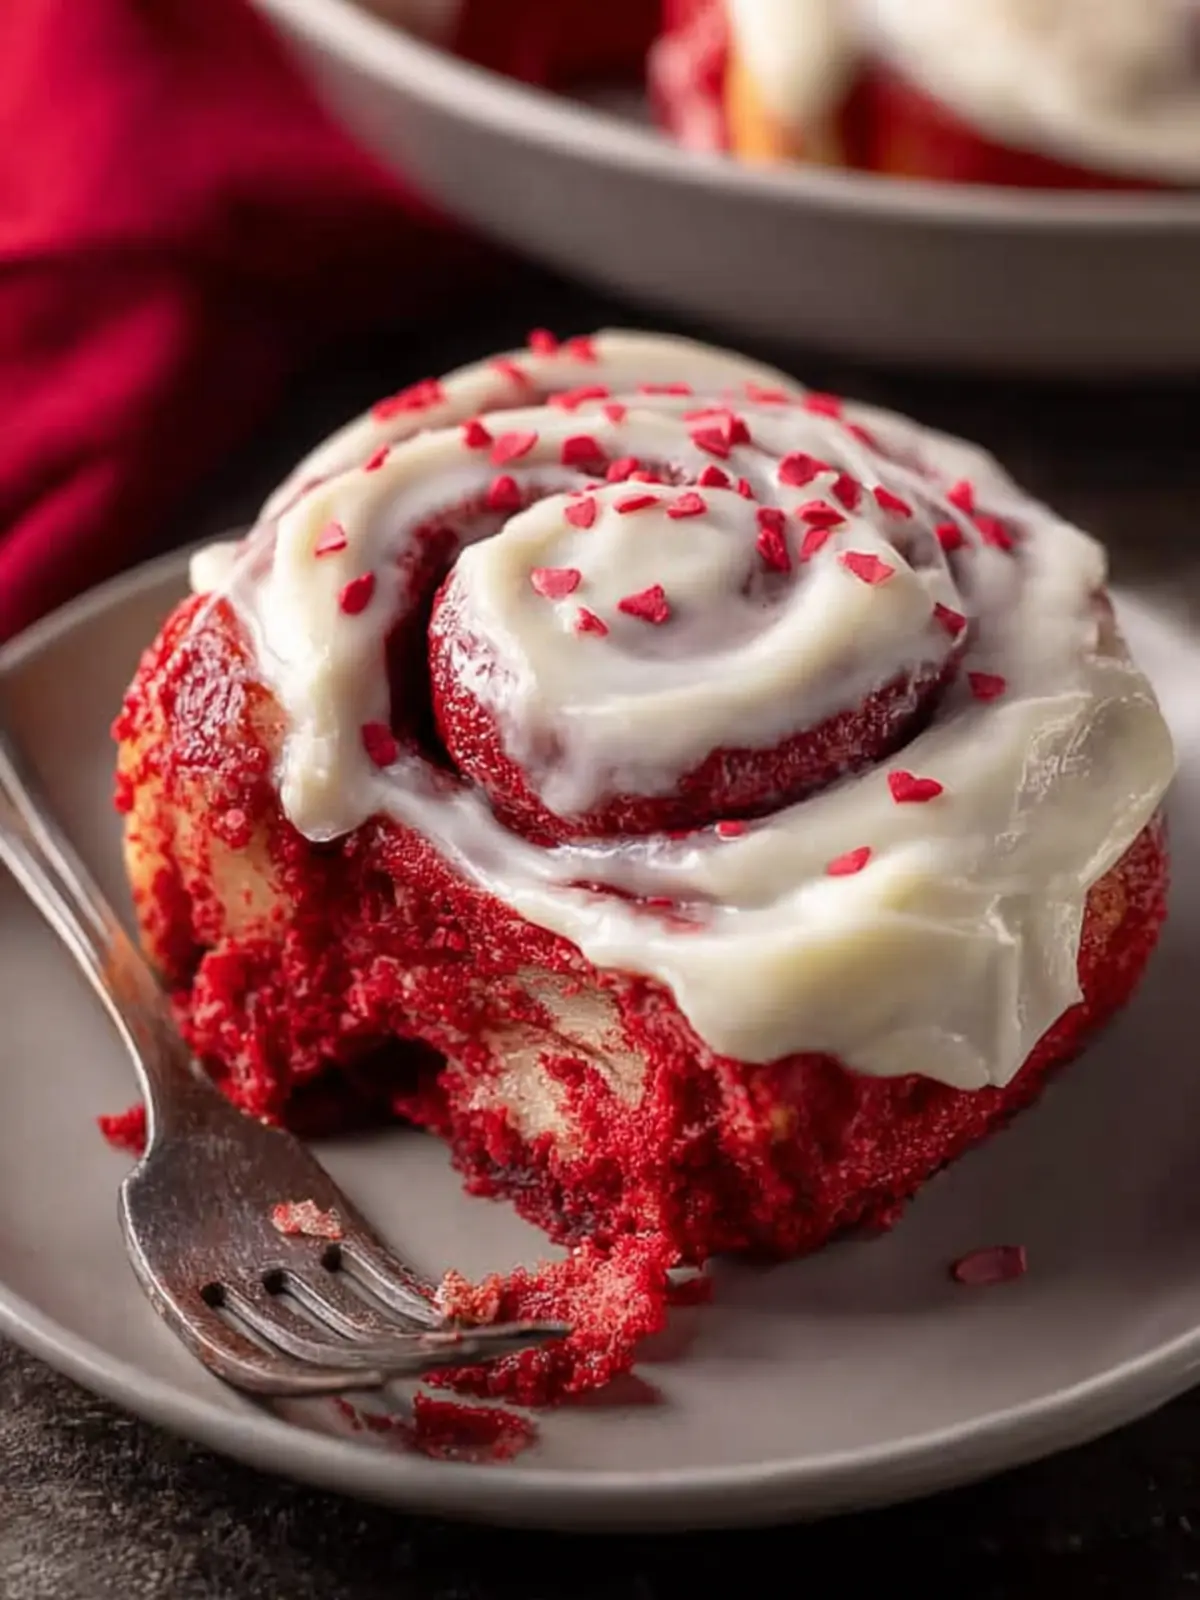
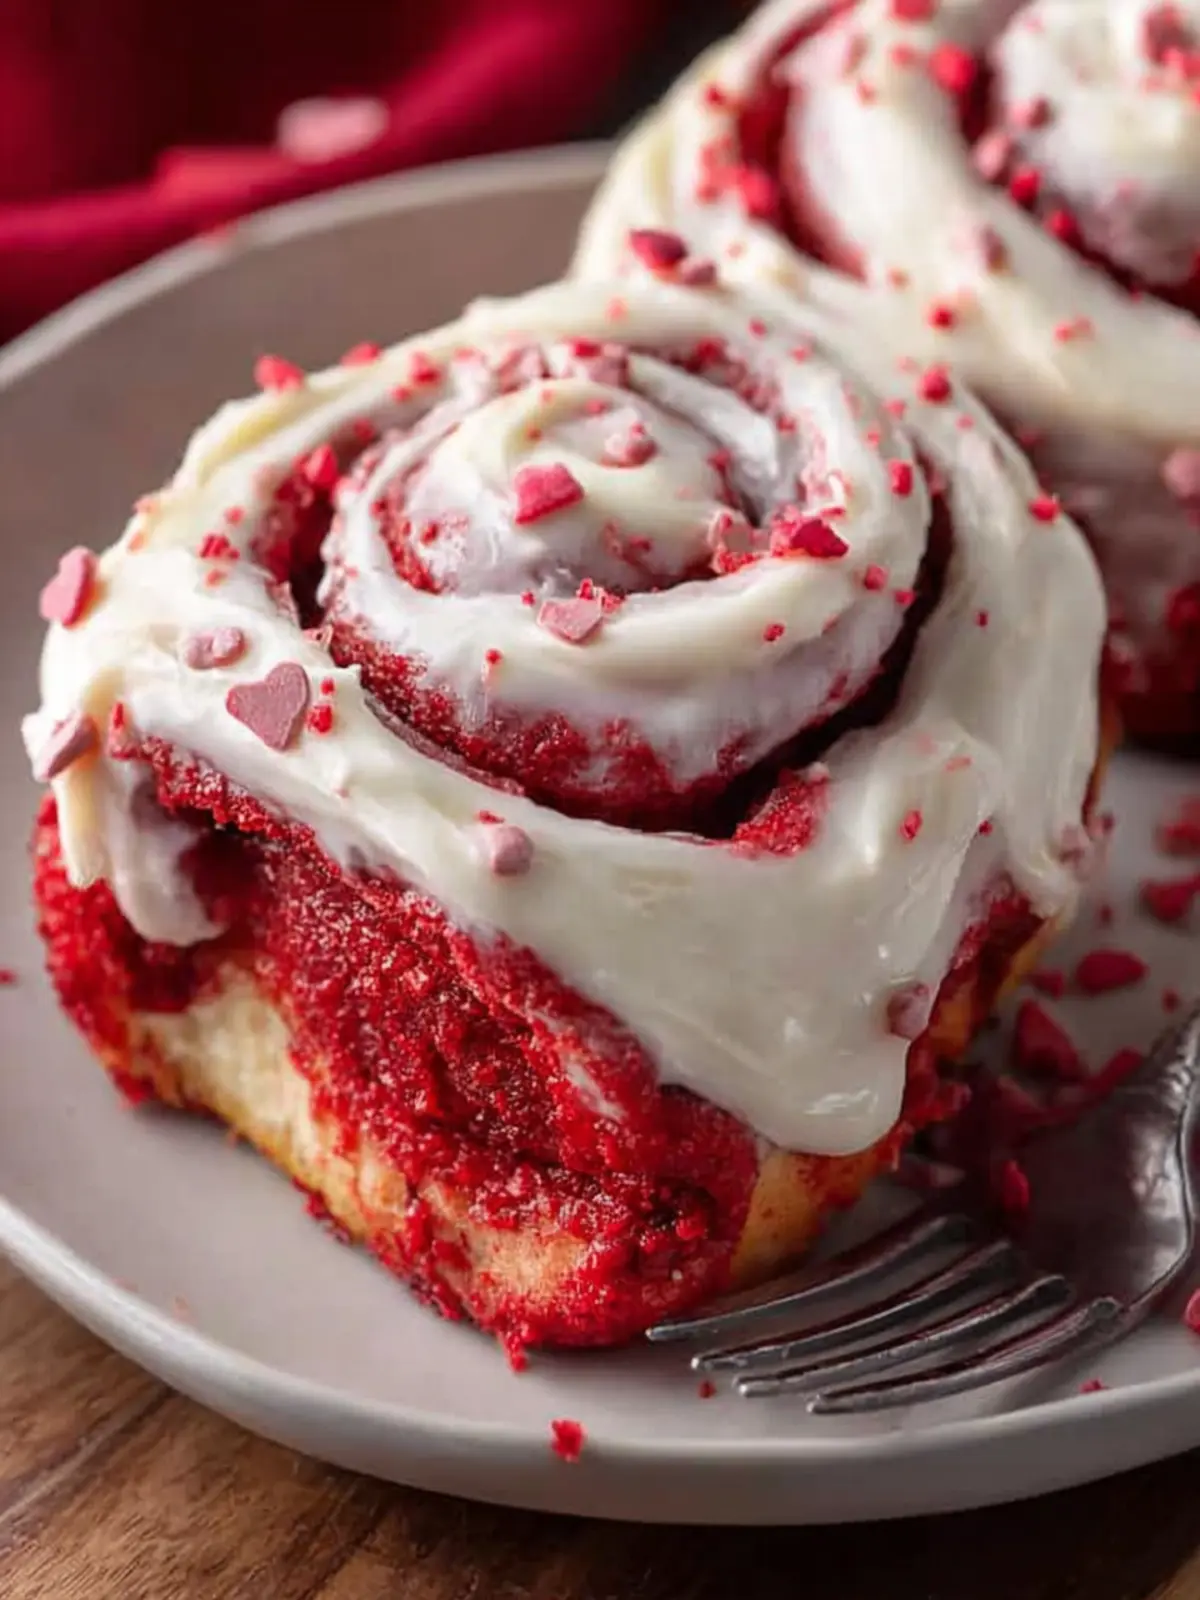
Looking to add a festive touch to your rolls? Consider sprinkling some heart-shaped sprinkles on top of your cream cheese frosting. This cheerful addition not only makes the rolls visually appealing but also adds a playful element for special occasions, from birthdays to anniversaries.
Presentation
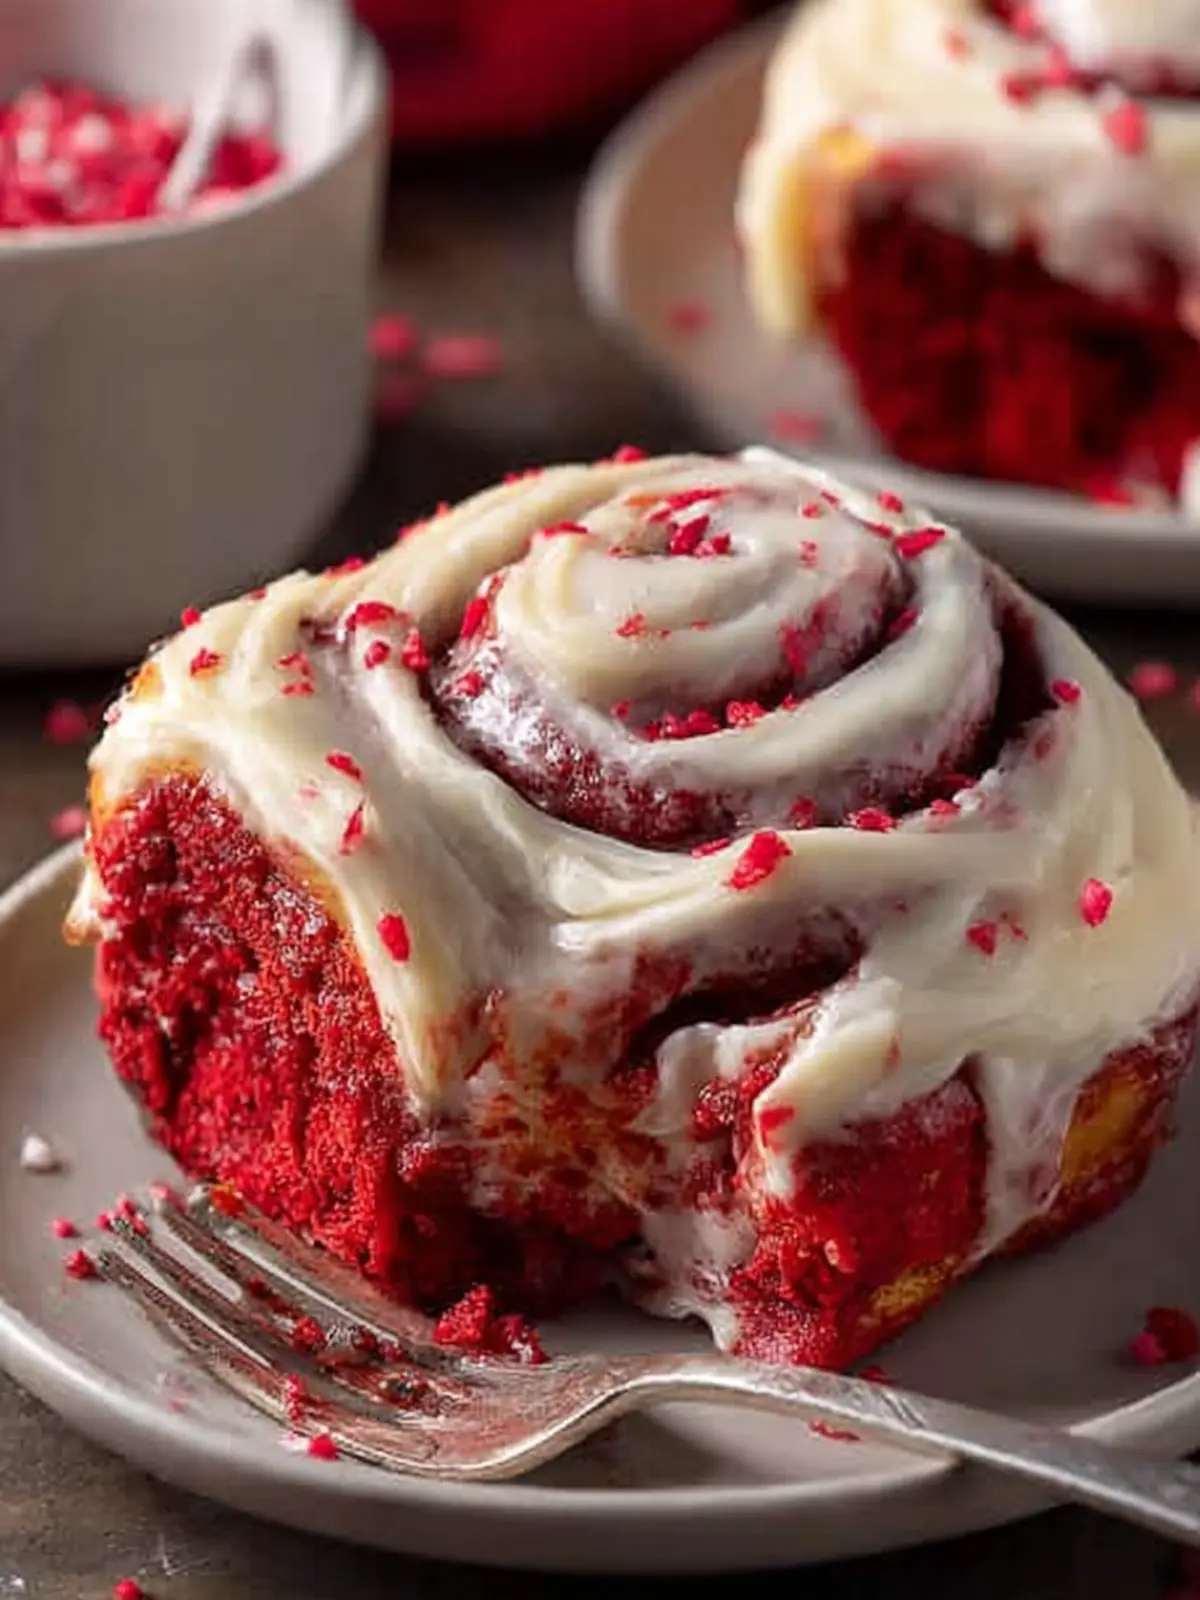
For the ultimate taste experience, serve your homemade red velvet cinnamon rolls warm, right out of the oven. The gooey frosting will melt blissfully into the soft, fluffy rolls, creating an irresistible treat that’s hard to resist. For an extra touch, present them on a beautiful serving platter, inviting friends and family to indulge in this sweet delight.
Time Breakdown for Preparing Cinnamon Rolls
Crafting homemade red velvet cinnamon rolls is not just an art; it’s a delightful journey that transforms your kitchen into a fragrant bakery. Here’s a quick timeline to guide you through this delicious process:
-
Preparation Time: 30 minutes
Spend this time combining ingredients, rolling out the dough, and preparing your filling. It’s a fun and creative stage where you can let your inner baker shine. -
Rising Time: 1-2 hours plus chilling
This is the moment for your dough to develop flavor and rise beautifully. Don’t rush it; a longer rise contributes to a fluffier texture. -
Baking Time: 25-30 minutes
As they bake, your home will fill with the warm scent of cinnamon and red velvet, making the wait all the more worthwhile. -
Cooling Time: 10 minutes
Let your rolls cool slightly before drizzling them with that irresistible cream cheese frosting. It’s just long enough to build anticipation!
With this timeline in hand, you’re well on your way to enjoying a comforting batch of homemade red velvet cinnamon rolls. Happy baking!
Nutritional Facts for Cinnamon Rolls
When whipping up a batch of homemade red velvet cinnamon rolls, it’s important to consider the nutritional aspect of this indulgent treat. Here’s a closer look at what you’ll be enjoying:
-
Calories: Approx. 320 calories per cinnamon roll. This delicious pastry is rich and satisfying, perfect for a special occasion or weekend treat.
-
Total Fat: Approx. 12 grams of total fat. The buttery goodness contributes to the soft texture, creating a delightful balance with the cream cheese frosting.
-
Carbohydrates: Approx. 45 grams of carbohydrates. These rolls are a sweet delight, making them ideal for a morning pick-me-up or dessert that satisfies your sweet cravings.
Enjoying your homemade red velvet cinnamon rolls in moderation ensures you can indulge without compromising your health goals.
FAQs about Homemade Red Velvet Cinnamon Rolls
When diving into the delightful world of homemade red velvet cinnamon rolls, you might find yourself with a few questions. Don’t worry! I’ve gathered some common inquiries and provided helpful answers so you can enjoy baking with confidence.
Can I use instant yeast instead of active dry yeast?
Absolutely! If you have instant yeast on hand, it’s a perfect substitute for active dry yeast in your homemade red velvet cinnamon rolls. Just remember that instant yeast has a slightly faster rising time. You can mix it directly into your dry ingredients without blooming it in water beforehand. This will save you a bit of time without sacrificing flavor or texture.
How should I store leftover cinnamon rolls?
To keep those mouthwatering homemade red velvet cinnamon rolls fresh, store them in an airtight container at room temperature for up to two days. If you want to extend their shelf life, you can refrigerate them, but don’t forget to bring them back to room temperature before enjoying. For that fresh-baked taste, a quick reheat in the microwave can do wonders!
Can I freeze these cinnamon rolls?
Freezing is a fantastic option for homemade red velvet cinnamon rolls. Once they’ve completely cooled, you can wrap each roll in plastic wrap and store them in a freezer-safe bag. They can last for up to three months in the freezer! When you’re ready to enjoy them, simply thaw in the refrigerator overnight and reheat them for that freshly-baked experience.
With these tips, you’ll be set to create and enjoy your homemade red velvet cinnamon rolls anytime you desire! Happy baking!
Conclusion on Homemade Red Velvet Cinnamon Rolls
A Prompt to Try
As you dive into the world of homemade red velvet cinnamon rolls, don’t shy away from adding your own twist! Whether it’s experimenting with different fillings or adjusting the sweetness of the cream cheese frosting, the fun lies in personalizing each batch to your liking. Who knows, your version might just become a new favorite!
A Nod to Sharing
Once you’ve mastered this delightful recipe, share your creations with friends and family. Imagine the smiles on their faces as they take their first bite of your homemade red velvet cinnamon rolls. Sharing is the sweetest part of baking, and your loved ones will appreciate the heart you put into every roll. Happy baking!
Print
Red Velvet Cinnamon Rolls
- Total Time: 3 hours
- Yield: 12 rolls 1x
- Diet: Vegetarian
Description
Delicious red velvet cinnamon rolls topped with cream cheese frosting.
Ingredients
Scale
- 2 tbsp all-purpose flour
- 1/2 cup whole milk
- 3/4 cup whole milk (warm (100–110°F))
- 2 1/4 tsp active dry yeast
- 1/4 cup granulated sugar
- 1/4 cup unsalted butter (melted)
- 2 large eggs (room temperature)
- 1 tsp vanilla extract
- 1 tbsp red gel food coloring
- 2 tbsp unsweetened cocoa powder
- 1 1/4 tsp salt
- 2 1/2 cups all-purpose flour
- 1 cup bread flour
- 5 tbsp unsalted butter (softened (added after kneading))
- 1/2 cup unsalted butter (softened)
- 3/4 cup brown sugar
- 1 tbsp cinnamon
- Pinch of salt
- 6 oz cream cheese (softened)
- 1/4 cup unsalted butter (softened)
- 1 cup powdered sugar
- 1 tsp vanilla extract
- Pinch salt
- 1–2 tsp milk (if needed for spreading)
Instructions
- Whisk flour and milk in a small saucepan over medium heat until thickened into a paste (2–4 minutes). Cool to room temperature.
- In a bowl, mix warm milk and sugar, sprinkle yeast, and let sit 5 minutes until foamy.
- In a stand mixer combine: tangzhong, yeast mixture, melted butter, eggs, vanilla, cocoa powder, food coloring, salt, both flours.
- Mix until a soft dough forms. Knead 5–8 minutes until smooth, then gradually add softened butter 1 tbsp at a time until incorporated.
- Place dough in a greased bowl, cover, and rise 1–2 hours until doubled. Chill 1–4 hours (this isn’t optional since the dough is pretty sticky, chilling will help make it more manageable).
- In a medium bowl mix the cinnamon, softened butter, salt, and brown sugar until smooth.
- Roll dough into a 16×12-inch rectangle.
- Spread softened sugar butter filling evenly, sprinkle brown sugar mixture. Cut into 12 strips and roll each strip into a spiral then place into a greased 9×13 pan.
- Cover and let rise 45–60 minutes until puffy.
- Bake at 325°F (165°C) for 25–30 minutes until centers reach about 190°F. Cool 10 minutes.
- Beat cream cheese and butter until smooth. Add powdered sugar, vanilla, and salt. Thin slightly with milk if needed. Spread over warm rolls and top with heart sprinkles.
Notes
- This recipe requires chilling the dough to make it manageable.
- For extra flavor, increase the vanilla extract in the frosting.
- Heart sprinkles are optional but add a festive touch.
- Prep Time: 30 minutes
- Cook Time: 30 minutes
- Category: Dessert
- Method: Baking
- Cuisine: American
Nutrition
- Serving Size: 1 roll
- Calories: 350
- Sugar: 25g
- Sodium: 180mg
- Fat: 15g
- Saturated Fat: 9g
- Unsaturated Fat: 4g
- Trans Fat: 0g
- Carbohydrates: 45g
- Fiber: 2g
- Protein: 5g
- Cholesterol: 60mg